


A rainy wedding day might not be what most couples hope for, but it can lead to some of the most magical and dramatic wedding photos. With the right approach, lighting, and a willing couple, rainy wedding day photography can create unforgettable images. Here’s how I take stunning wedding photos in the rain!
A quick note: This is a very basic post without exact settings. If you’d like a more technical breakdown, let me know!
Are My Couples Comfortable With a Rainy Wedding Day Shoot?
The first step is always to check in with my couples. Not everyone wants to step out into the rain, and that’s completely understandable! Hair, makeup, and outfits are all considerations—especially if they don’t have a second set of clothes to change into. If my couple isn’t comfortable getting wet, I look for sheltered spots or take indoor photos. However, some couples are open to a few rainy wedding day photos towards the end of the night when they’re less concerned about staying dry.
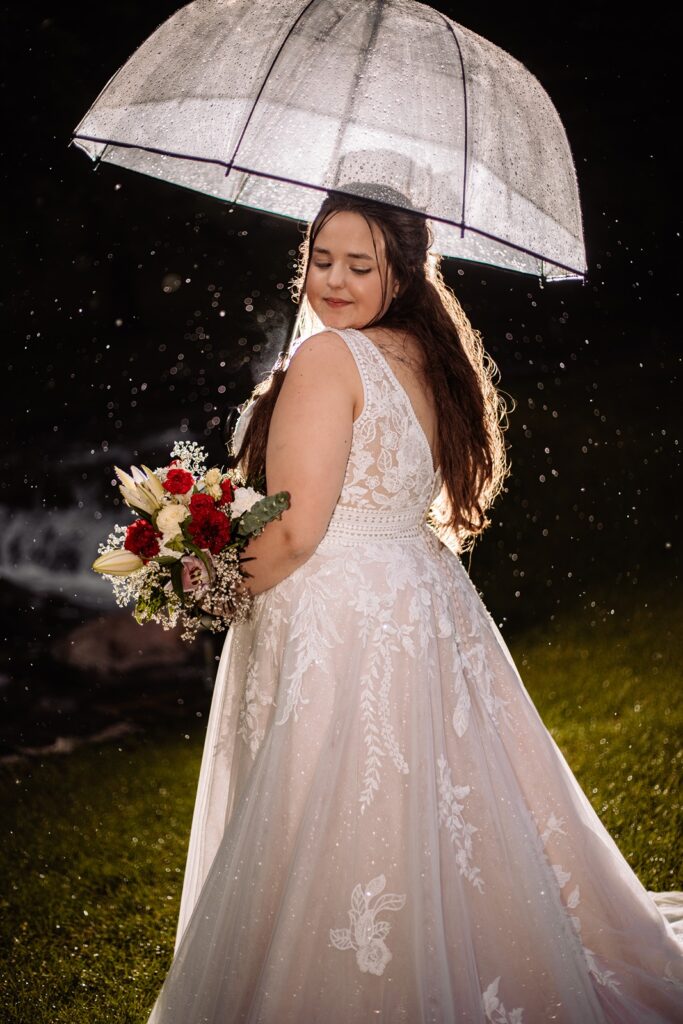
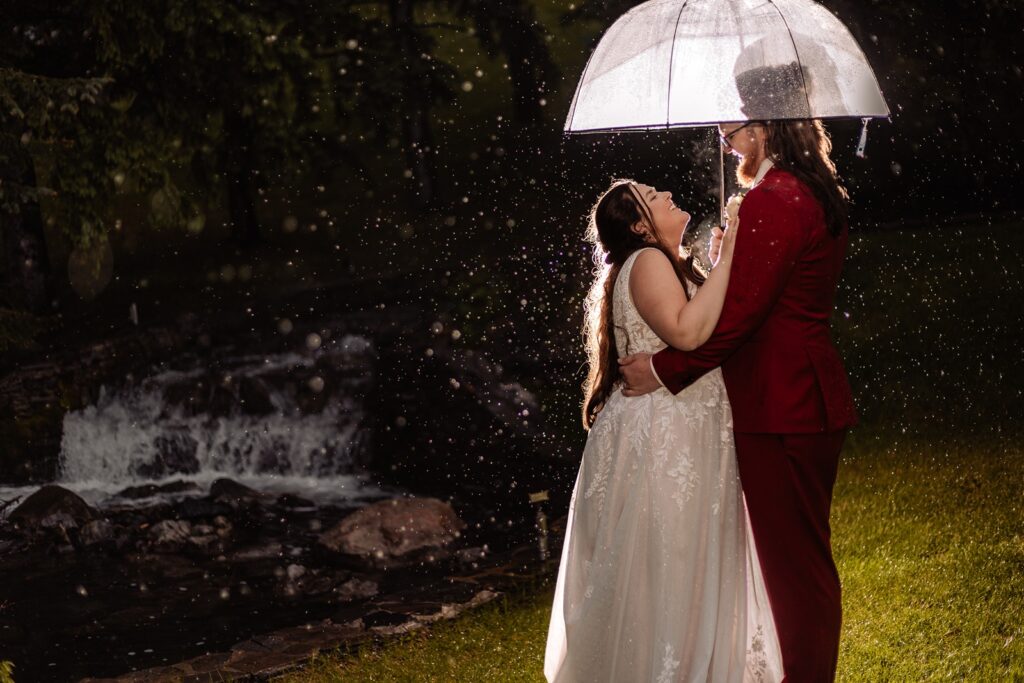
To help keep my couples somewhat dry, I always keep a clear umbrella in my car. This not only provides some protection from the rain but also serves as a stylish prop that can add a romantic touch to the photos.
How to Light Up the Raindrops for a Stunning Effect
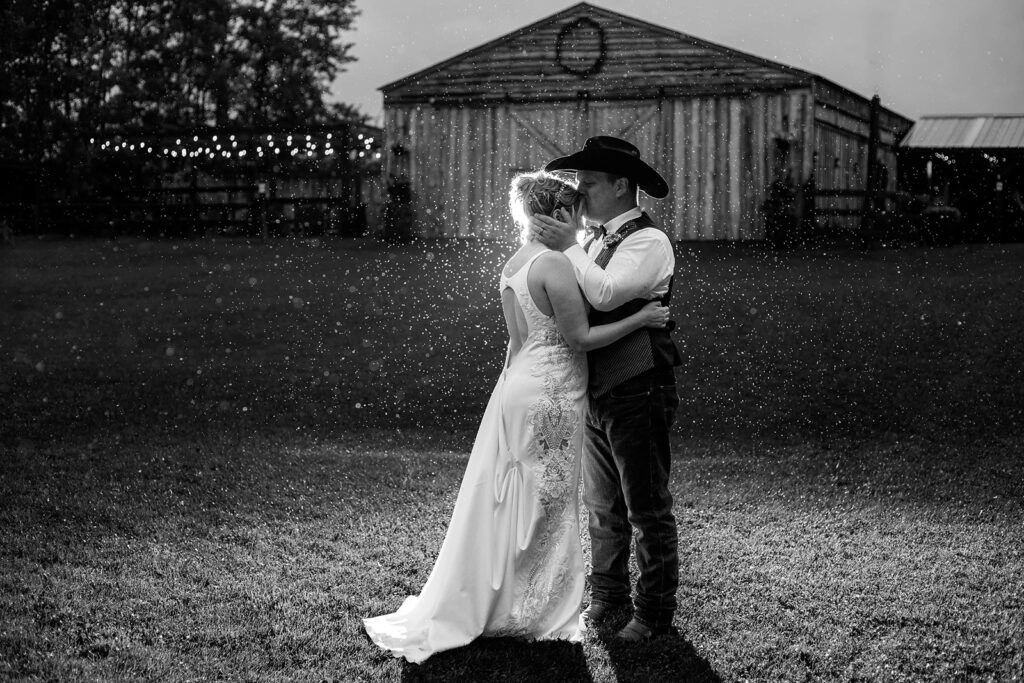
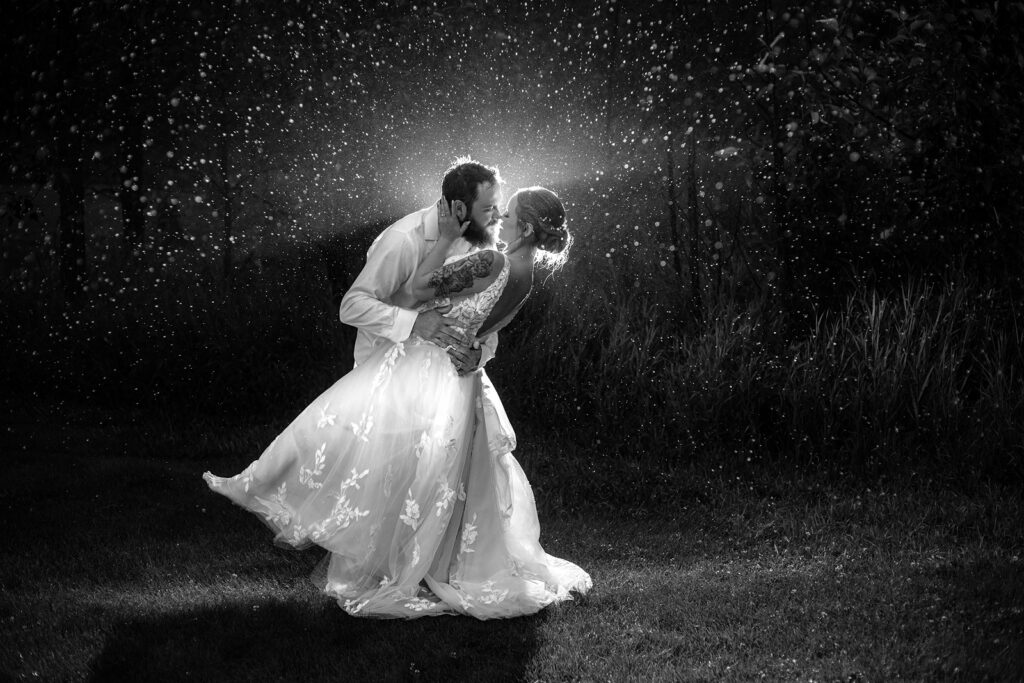
One of the key elements of a great rainy wedding day photo is properly lighting up the rain. Off-camera flash is my go-to tool for this. The flash freezes the raindrops and illuminates them, adding a dreamy and cinematic feel to the images. Here’s my process:
- I place an off-camera flash behind the couple.
- To avoid a silhouette effect, I also use either an on-camera flash or a second off-camera flash positioned beside me to light up the front of the couple.
- I typically use TTL mode on my flash, making it easy to adjust settings without much fuss.
- The couple’s bodies act as a shield, blocking most of the light from the flash behind them. This creates a gorgeous rim light without producing an overpowering burst of light that washes out details.
For my flashes, I use a Godox AD200 Pro, a Godox V860ii speedlite, and a Godox V860iii speedlite. I usually have them on Strobepro stands, or if I don’t have stands with me, I have someone hold them. The AD200 is my preferred light behind my couples, and I cover it with a small towel to protect it from rain.
Any time I don’t have a speedlite on my camera to trigger my AD200 Pro, I use a radio trigger which I can use to control all 3 of my flashes at once.
(The Godox V860iii is the new version of the Godox V806ii. I use the Canon versions for both of these as they are brand-specific, so confirm you purchase the right one for your camera system! This is also the case for the radio triggers.)

Creating a Silhouette Effect on a Rainy Wedding Day
Sometimes, I want a more dramatic look by leaving my couple in silhouette. To achieve this effect:
- I follow the same process as above but eliminate the front-facing flash.
- The rain remains lit up beautifully, while my couple is outlined as a silhouette.
- This technique adds an artistic and cinematic touch to rainy wedding day photography.

How to Create This Effect When It’s Not Raining
What if you love the look of rainy wedding day photos but don’t have actual rain? No problem! You can replicate the effect with:
- A garden hose
- A sprinkler
- A misting machine
I recently took a silhouette-style photo at the Calgary Stampede, where I used an outdoor misting arch. My husband held the flash behind my couple, and I let the mist work as the “rain.” Since the Stampede is always packed with people, the silhouette effect was perfect for keeping the focus on my couple without the distraction of a crowded background.

Embracing the Beauty of a Rainy Wedding Day
A rainy wedding day might not be in the original plans, but with the right preparation and lighting techniques, it can result in some of the most breathtaking wedding photos. Whether embracing the rain or recreating the effect, I love capturing these stunning and unique moments for my couples!
If you want someone who isn’t afraid when it rains on your wedding day, let’s chat!

